Creating a Multi-Selection Table

Use
You can define a table to enable selection of either single or multiple rows. When a user selects multiple rows, all of the rows are transferred to the data service.
The following procedure explains the settings that you need to define in order to create a model with a multi-selection table.
Prerequisites
The data service used in the model can receive multiple rows.
Procedure
...
1. In your model, double-click the table that serves as the input to the data service. The Configure Element task panel is displayed.
2. From the Selection mode drop-down list, choose Multiple. This will enable users to select multiple rows.
3. Select the line connecting the output port of the table and the data service.
4. From the Mapping scope drop-down list in the Configure Element task panel, choose one of the following:
Selected data rows transfers only the table rows that have been selected
All data rows transfers all rows of the table.
5. On the Layout board, create a button for transferring the values of multiple table rows to the data service:
LIST NUMBER 2 (two items):Right-click the table and choose Create Toolbar from the context menu. The Create Toolbar Buttons dialog box is displayed.
Create a button named logically – such as Submit Selected Rows – and define the action that transfers the table rows to the data service. The action should be the same as the event defined for the connecting line. (For more information about creating buttons, see Create a Toolbar). You may want to create a second button, such as Submit All Rows, as well.
NOTE
Instead of creating a button, you can use the Select row default event, which automatically transfers to the data service each additionally selected row. However, for multi-selection tables it is recommended to create a button.
LIST NUMBER 2Click OK.
Results
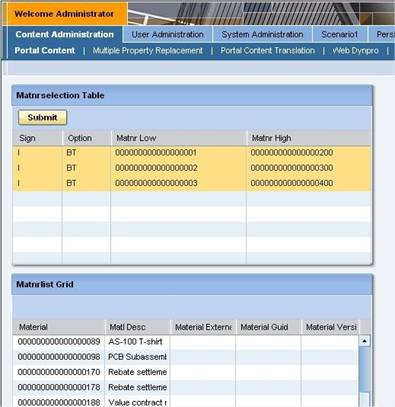
At runtime, the user can select rows by holding down the Ctrl key and clicking each additional row, and then submitting them using the appropriate button, as can be seen in the following example: