
 Fine-Tuning and Deployment

Use
In this example, you fine-tune the layout of the input form and the value help dialog box itself, and deploy the model.
Prerequisites
You have configured the main model elements, added and configured value help, and the model is open in Storyboard.
Procedure
...
1. On the Layout board, adjust the size of the input form:
a. Click the right edge of the form and drag to the right, so that it is as wide as the table below it.
b.
Tip: You can select
the form and click the Fit to Window (  )
button in the Layout toolbox at the bottom.
)
button in the Layout toolbox at the bottom.
2. Adjust the layout of the Sales Organization field:
a. Right-click the Sales Organization field and from the context menu, choose Properties, to display the Control Properties dialog box.
b. Click the Display tab and from the Label position drop-down list, choose Long label. The label is adjusted accordingly.
c. Click Close.
d. Move the field to the right, towards the center of the form, so that the label is fully visible.
3. Edit the text and size of the value help button:
a. Right-click the Value Help button and from the context menu, choose Edit Label.
b. Enter Value Help for Sales Organization... to indicate that this button displays a dialog box in which you can select a value for the sales organization.
c. Click the edge of the button and drag to the right to resize it to accommodate the longer text.
d. Move the button as appropriate so that it doesn’t overlap the Sales Organization field.
4. Fine-tune the layout of the value help dialog box itself:
a. Go to the Design board, right-click Value Help for Sales_organization, and from the context menu, choose Drill Down.
b. Here, you see the layout of the embedded iView that represents the value help, which you created in the previous example using the value help wizard:
c. The Characteristic: 0D_SALE_ORG data service, together with its start point and search results, supplies the list of values. The Select form represents the dialog box in which the list of values appears.
d. Go to the Layout board to see and adjust the layout of the dialog box. Resize it, and enter new labels for the table and buttons as desired, for example:
e. Tip: To change the window title of this dialog box, change the window title of the popup signal that represents the embedded iView:
f. Go back to the Design tab for the main model.
g. Select (single-click) Value Help for Sales_organization to display the Configure Element task panel for the popup signal.
h. Enter new text in the Window title field as desired, for example: Select Sales Organization.
5. Go to the top level of your model and deploy (if necessary, first set your compiler to Adobe Flash format, on the Visual Composer Tools → Options → Compiler tab):
a. Click the Deploy button in the task-panel toolbar.
b. Click Deploy.
Result
The model is compiled and deployed to the portal to which you are connected. View the runtime version of your model by clicking Run "Order_and_sales_values_select_", under the Deployed successfully message in the Deploy to Portal task panel.
The iView looks something like this:
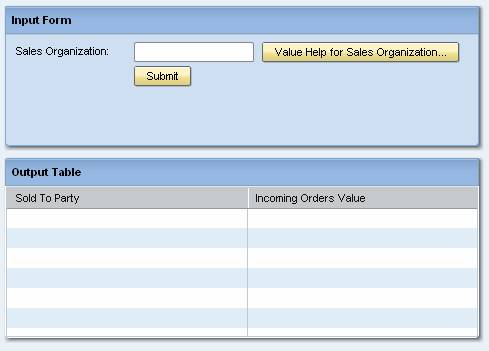
When you click the Value Help for Sales Organization button, value help is displayed in a dialog box. This consists of a list of possible text values for Sales Organization next to the actual key equivalents for the value. The dialog box looks something like this:
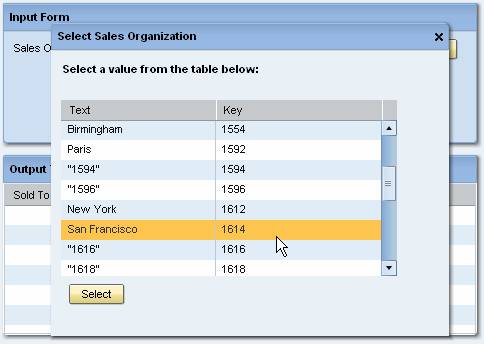
When you select a value and click Select, the Sales Organization field is filled with the proper key for the field as required by the query. When you then click Submit, the values in the Output Table update with the results of the query:
