Designing Work Areas
Standard Setting
Setting Up Work Areas
Changing the Size of Subareas
Resetting Changes
1. Standard Setting
After you have started the ABAP Debugger, there are altogether nine work areas available. These have Standard Settings. Each work area can be changed by the user with respect to size as well as type and number of tools. However, only settings in the three user-specific Desktop work areas can be saved to the database using the function Save Layout; these are then available when the Debugger is restarted. The remaining areas always appear with their standard settings each time the Debugger is restarted.
2. Setting Up Work Areas
In each work area, a maximum of four tools can be used simultaneously. You can set them up using the function  New Tool, which the following window displays:
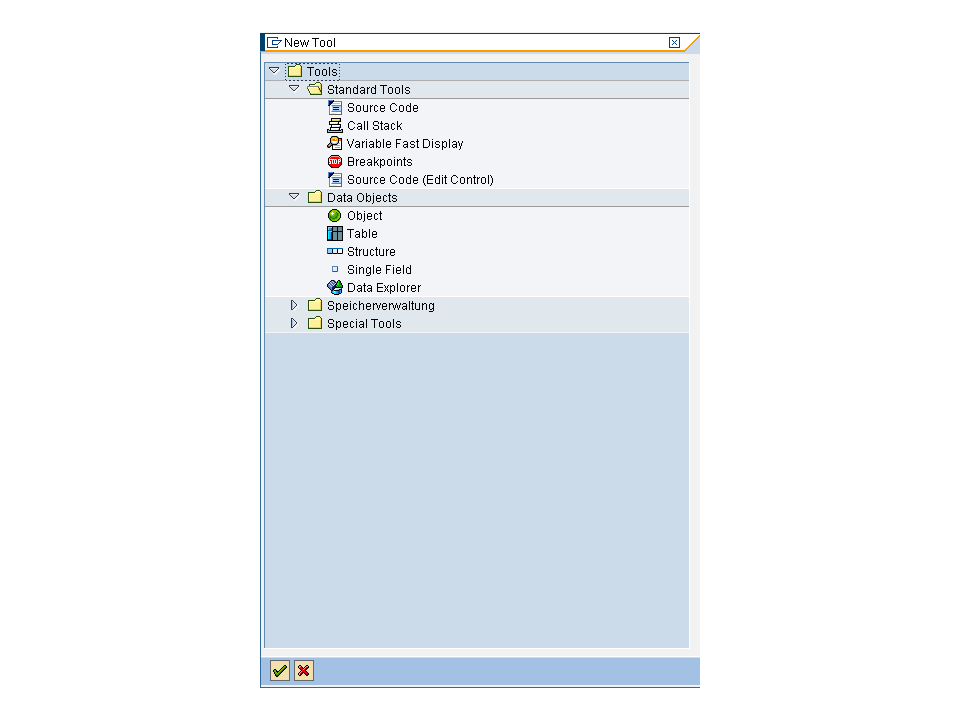
Depending on the requirements, you can select the same tool four times for each work area. But you can also use four different tools.
Using the  Close Tool function, you can delete tools once again within a work area. However, at least one tool must remain as a full screen because this function will then no longer be provided.
Using the  Replace Tool function, a tool that is already placed can be replaced by another tool. This tool then takes over the same position. If you choose this function, the same window as in the New Tool function will be displayed.
The function  Swap enables you to replace tools in horizontal and in vertical direction. This function is offered only if the work area contains at least two tools. If you have two tools, however, you can only replace in vertical direction. If you have more than two tools, exchange in vertical as well as in horizontal direction is possible. These can be selected through the following window.
The  Full Screen function enlarges any tool you have selected to the entire work area size that is available. A tool is always shown as full screen within a work area as soon as this work area does not contain other tools.
Finally, you can change a selected tool with respect to size or position using the functions  Horizontal and
  Vertical. This function, too, is offered only if the work area contains at least two tools. In this case, both tools are displayed –depending on the direction selected –over the entire height or width of the work area. In the case of three tools, the tool to be maximized can be enlarged –again depending on the direction chosen –over the entire height or width of the work area. Then the two other tools are only displayed as half-size displays. If you have four tools, the tool placed in the neighboring area is hidden.
3. Changing the Size of Subareas
Each subarea of a work area can be changed in size horizontally and vertically using the red arrows at the left and upper margin of this work area.

They are used to display a chosen tool either larger or smaller than the neighboring tool. In contrast to the functions Maximize Horizontally and Maximize Vertically, a tool is not in any way hidden.
This function, too, is offered only if the work area contains at least two tools. In this case, only the arrows for horizontal scrolling are available. If you have more than two tools, the sizes of neighboring tools can also be changed vertically.
4. Resetting Changes

Using the Back function you can take back any changes whether that be setting up work areas or size changes to subareas. The number of resetting steps is unlimited. As soon as no further resets are possible, the system sets the icon to status Inactive.

A special Back function is provided for the structure and table display in the form of a green arrow pointing to the left. This arrow does not reverse any changes, but merely switches between various views - for example, from the detail display of a component back to the structure view above it.