
 Creating a BSP Application
Use
Web applications are implemented in the SAP System as BSP Applications (see also What Is a BSP Application?). So, first you need to create a BSP application.
Procedure
1. Log on to the SAP System.
2.
To create a separate branch for
maintaining HTTP services regardless of the SAP service tree for your
application(s), first create a namespace for your BSP application(s). Proceed
as described in  Creating Namespaces
for Developments. You can specify the name of your company, for example,
as a name for your namespace.
Creating Namespaces
for Developments. You can specify the name of your company, for example,
as a name for your namespace.
3. From the SAP menu, choose Overview ® Object Navigator, or alternatively call Transaction SE80.
This takes you to the Object Navigator in the ABAP Workbench.

4.
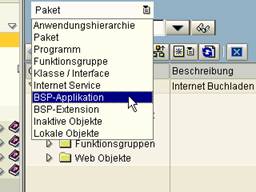
Select BSP Application from the pull-down menu in
the top field of the Repository Browser. In the
field underneath, enter a meaningful name for your BSP application:
/<namespace>/<application name>
The system automatically creates a corresponding namespace directory in the MIME Repository and an ICF node in the format /sap/bc/bsp/<namespace>/<application name>
If you have not defined a separate namespace, you can call your application simply myapplication. We have chosen this variant in the example.

Note that when you create a BSP application such as myapplication, the system automatically creates the application as /sap/myapplication since the default namespace is sap.
Also, make
sure that the length of the name you choose is not longer than the service
name in Transaction SICF (see also Creating an ICF
Service).
5.
Choose  .
.
6. In the popup that appears, confirm that your BSP application is a new object.
In the next popup, enter a short
description for your BSP application and choose  .
.

7. In the next popup, enter a package name and save your entries.


If your BSP application is purely a test or sample application, save it as a local object and assign the package $TMP to it. If, on the other hand, you want to use the application productively, select an existing package, and assign the object to a modifiable transport request, so that you can transport it later. See the F1 Help of the Package field for detailed information on the package concept.
Result
The Web Application Builder now opens automatically. There you see the empty “container” you have just created for your BSP application. The next step is to “fill” your application.

When you create a BSP application, from SAP Web AS 6.20 a node is
automatically created in the ICF service tree (see also Creating an ICF
Service).
 To continue
with creating your BSP, go to Creating a
BSP.
To continue
with creating your BSP, go to Creating a
BSP.