Working with the GWM Excel Add-In Application
This section will guide you to use the GWM Excel add-in application you have generated.
Context
Once you create a GWM Excel add-in project using GWM Visual Studio Add-In, you can build and run your solution, to test or experience the application as an end user.
Your GWM Excel add-in application displays as a menu item in the Microsoft Excel application. For example, if your GWM Excel add-in project is called GWPAMExcelAddIn2, that name displays in the menu of the Microsoft Excel application.
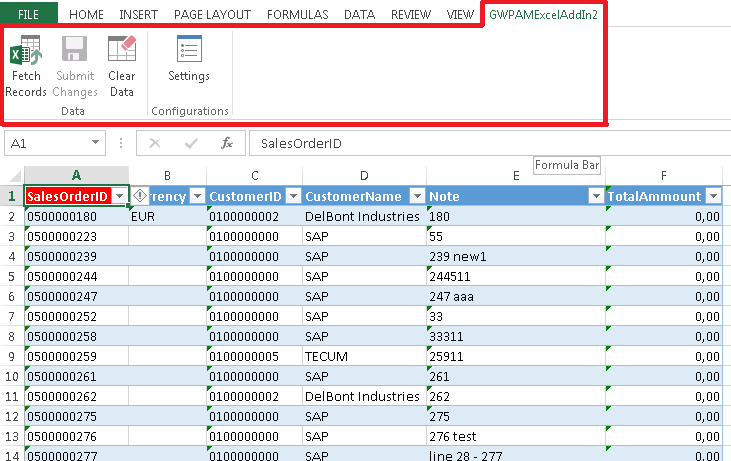
When you open the menu, it displays the following buttons in a toolbar as shown in the image above:
-
Fetch Records
The Fetch Records button allows users to retrieve data from the SAP Gateway system into the Microsoft Excel application.
When selected, all relevant data is retrieved based on the criteria specified in the wizard. A request to get the data is sent to the SAP system, and steps to bind the data to the worksheet, and to populate the Excel Data Table with the data are executed.
In addition, the Excel worksheet is formatted according to the data types. All the columns in the Excel add-in application are formatted according to the data type coming from the SAP system, for instance, an EDM.String in the SAP system is maintained as Text format in Excel.
- The EDM types, Edm.Int32, Edm.Int16, Edm.Int64, Edm.Double, Edm.Decimal are formatted in Excel as Number.
- The EDM types, Edm.String, and Edm.Time are formatted in Excel as Text.
- The EDM type, Edm.DateTime is formatted in Excel as Date.
- The EDM type, Edm.Binary, Edm.Boolean, Edm.Byte, Edm.DateTimeOffset, and Edm.Guid are formatted in Excel as General.
- All other EDM types are formatted in Excel as General.
The Excel add-in application users can repeatedly retrieve data from the SAP system to get the latest updates, if they had previously obtained the data from SAP system.
When users edit the data in the Excel add-in application without submitting the changes to the SAP system, and they try to refresh their content by clicking the Fetch Records button again, they get a message with options to define what they intend to do. They can choose to save the changes in the Excel add-in application without getting the latest updates from the SAP system, or they can choose to get the latest updates from the SAP system to replace their changes.
-
Submit Changes
The Excel add-in application users can edit (create, update and delete) the SAP data in their Excel table. When users choose the Submit Changes buttons, all their changes are transferred to, and saved in the SAP system.
In addition, users can edit the SAP data, save the changes and exit Excel without submitting their changes to the SAP system. Later, when they open the same Excel file, they can submit the changes that were not submitted before.
The whole process is maintained by means of hidden sheet mechanisms that maintain the users' changes in binary format, and reloads it when requested.NoteGWM Excel Add-in does not support collections with complex property type.
-
Clear Data
The Clear Data button allows users to remove the SAP data displayed in the Excel table. It does not have any impact on the data in the SAP system.
- Settings
In the Excel add-in application, users can redefine the configuration settings for presenting and viewing SAP data in Microsoft Excel using the Settings button. When you choose Settings, the Edit Settings dialog opens. You can specify the following:
-
Maximum Records to Fetch: The default value is 100.
-
Select a Value for the Column Header: In the drop-down box, you can select Property Name or Property Label or Both.
-
Select a Highlight Color for the Mandatory Cells: Click Color Picker to open the Color dialog box.Note
Changes made in Settings reflect only after records are fetched again.
-
To work with the generated GWM Excel add-in application, proceed as follows:
Procedure
- From the Visual Studio menu, choose
 Debug
Debug  Start Debugging
  . The Microsoft Excel application starts.