
 Deploying Applications
Deploying Enterprise Application Projects
...
1. Use the Add and Remove Projects option from the context menu in the Servers view, and select the new projects to add there.

2. To deploy the applications, select the SAP Server node and choose Publish from the context menu. You have to enter a valid user and password for the selected AS Java.
The SAP NetWeaver Developer Studio switches to the Deploy View Consoleview. The current results from the deploy operations are displayed there.

If the deployment finishes successfully, you will see a success dialog.

The Publish option deploys all projects added to the Servers view.
Re-deploying Enterprise Application Projects
Once you have added an Enterprise Application Project in the Servers view, you can re-deploy it many times from there. You only choose Publish from the context menu of the SAP Server node in the Servers view, and the deployment of the projects starts (see also step 8 of the Adding an SAP Server Instance section).
Adding an SAP Server Instance
By default, you have a pre-defined SAP Server instance in the Servers view, and you do not have to add one manually. You have to do so, if you want to connect to a different instance of the J2EE Engine from the one installed initially with the SAP NetWeaver Developer Studio (for example, this could be a test PC with a running J2EE Engine).
To add a new SAP Server instance:
1. If the Servers view is not already open, open it by choosing Window → Show View → Other → Server → Servers.
2. From the context menu in the Servers view, choose New → Server.
3. In the New Server wizard, choose SAP → SAP Server and then Next.

4. Check if the SAP Server Host and Msg Server Port settings have correct values. If they do not, specify correct values by choosing the engine settings link (it opens the SAP J2EE Engine section of the Preferences dialog).

These settings (message server host and port) are required for connecting to the J2EE Engine.
By default, the Message Server Host and the Message Server Port is are set to the host and message port of the J2EE Engine installed along with the SAP NetWeaver Developer Studio by the JavaOne Installer.

5. Choose Next.
6. Choose the Enterprise Application Projects that you want to deploy on the J2EE Engine at this stage (you can always add new projects from the Servers view).
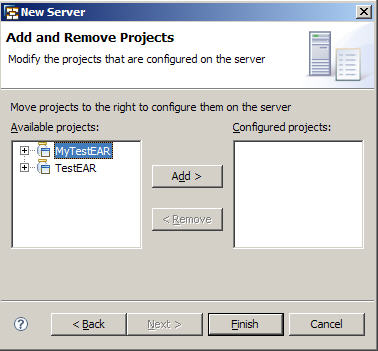
7. Choose Finish.
The SAP Server entry appears in the Servers view.
8. To deploy the applications you selected, select the SAP Server node and choose Publish from the context menu.