Step 13: Element Binding
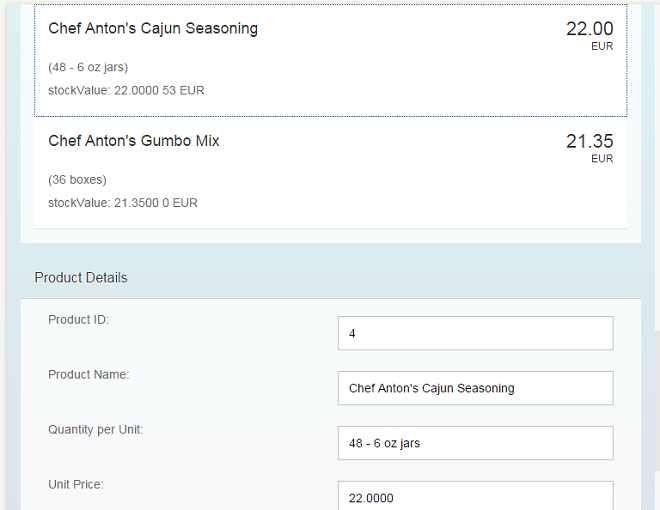
Now we want to do something with that newly generated list. In most cases you will use a list to allow the selection of an item and then show the details of that item elsewhere. In order to achieve this, we use a form with relatively bound controls an bind it to the selected entity via element binding.
You can view and download all files in the Explored app in the Demo Kit under Data Binding - Step 13.
...
        </items>
      </List>
    </content>
  </Panel>
  <Panel id="productDetailsPanel" headerText="{i18n>panel4HeaderText}" class="sapUiResponsiveMargin" width="auto">
    <l:Grid defaultSpan="L3 M6 S12" containerQuery="true">
        <Label text="{i18n>ProductID}:" />
        <Input value="{products>ProductID}" />

        <Label text="{i18n>ProductName}:" />
        <Input value="{products>ProductName}" />

        <Label text="{i18n>QuantityPerUnit}:" />
        <Input value="{products>QuantityPerUnit}" />

        <Label text="{i18n>UnitPrice}:" />
        <Input value="{products>UnitPrice}" />

        <Label text="{i18n>UnitsInStock}:" />
        <Input value="{products>UnitsInStock}" />

        <Label text="{i18n>Discontinued}:" />
        <CheckBox value="{products>Discontinued}" />
    </l:Grid>
  </Panel>

</mvc:View>
Now we have an empty form. In order to fill this form with data, we will bind the whole panel to the path of the element which we clicked in the list. We need to add a press-event handler to the items in the list.
...
  <Panel headerText="{i18n>panel4HeaderText}" class="sapUiResponsiveMargin" width="auto">
    <content>
      <List headerText="{i18n>productListTitle}" items="{products>/Products}">
        <items>
          <ObjectListItem
              press=".onItemSelected"
		    type="Active"
              title="{products>ProductName}"
              number="{ parts: [{path: 'products>UnitPrice'},
                                {path: '/currencyCode'}],
                        type: 'sap.ui.model.type.Currency',
                        formatOptions: { showMeasure: false }
                      }"
              numberUnit="{/currencyCode}">
              <attributes>
... ...
onItemSelected: function(oEvent) {
var oSelectedItem = oEvent.getSource();
var oContext = oSelectedItem.getBindingContext("products");
var sPath = oContext.getPath();
var oProductDetailPanel = this.getView().byId("productDetailsPanel");
oProductDetailPanel.bindElement({ path: sPath, model: "products" });
}In the controller, we bind the newly created panel to the correct item whenever it is pressed.
Element bindings can also be relative to its parent context.
...
# Screen titles
panel1HeaderText=Data Binding Basics
panel2HeaderText=Adress Details
panel3HeaderText=Aggregation Binding
panel4HeaderText=Product Details

# Invoice List
invoiceListTitle=Invoices
statusA=New
statusB=In Progress
statusC=Done

# Error messages
invalidDate=Invalid Date Format

# Product list
productListTitle=Product List
stockValue=Current Stock Value

# Product Details
ProductID=Product ID
ProductName=Product Name
QuantityPerUnit=Quantity per Unit
UnitPrice=Unit Price
UnitsInStock=Number of Units in Stock
Discontinued=Discontinued
# Screen titles
panel1HeaderText=Data Binding Grundlagen
panel2HeaderText=Adressdetails
panel3HeaderText=Aggregation Binding
panel4HeaderText=Produktdetails

# Invoice List
invoiceListTitle=Rechnungen
statusA=Neu
statusB=Laufend
statusC=Abgeschlossen

# Error messages
invalidDate=Ungültiges Datumsformat

# Product Details
ProductID=Produkt-ID
ProductName=Produktname
QuantityPerUnit=Mege pro Einheit
UnitPrice=Preis der Einheit
UnitsInStock=Lagerbestand
Discontinued=Eingestellt
Add the missing texts to the properties files.