
 Defining Actions in the actions.xml
File
Defining Actions in the actions.xml
File 
Use
You have now included permission checks in your application to check if a user has the authorization to view reservations or to maintain a reservation for a specific vehicle type. To perform these activities, the user must have the appropriate permissions assigned in his or her user account.
To make the administration of these permission assignments easier, you will group individual permissions together in actions that the administrator will assign to the user’s roles. To specify these groups of permissions in corresponding actions, create a file with the name actions.xml. You will create this file in a Development Component (DC) project in the SAP NetWeaver Developer Studio.
The actions.xml file that you create for this tutorial will contain the following actions:
· AccessQuickCarRental
Users that are assigned to roles containing this action will be able to access the quick car rental JSP application. There is no differentiation between the car types and no maintenance permissions are provided. The corresponding permissions are checked in the JSP application using the QuickReservationPermission class.
· ViewReservations
Users that are assigned to roles containing this action will be able to view reservations. The corresponding permissions are checked in the EJB methods using the QuickReservationEjbPermission class.
· MaintainStandard
Users that are assigned to roles containing this action will be able to maintain standard vehicle types (economy, compact, intermediate, full size, and mini van). The permissions are also checked in the EJB methods using the QuickReservationEjbPermission class.
· MaintainPremium
Users that are assigned to roles containing this action are also able to maintain the premium and luxury vehicle types. The corresponding permissions are also checked in the EJB methods using the QuickReservationEjbPermission class.
Prerequisites
|
|
The J2EE Development perspective is displayed in the SAP NetWeaver Developer Studio. |
|
|
The quick car rental application’s projects are displayed in the J2EE Explorer. |


Procedure
...
1. Switch to the Navigator.
2. Choose File ® New ®Project from the menu.
The New Project dialog appears.
3. Select Development Component and choose Next.
The New Development Component Project dialog appears.
4. Expand Local Development, select MyComponents and choose Next.
5. Enter a name for the project, for example, Actions, in the Name: field.
6. Under Type:, expand the Content node, select UME Permissions and choose Finish. See the figure below.
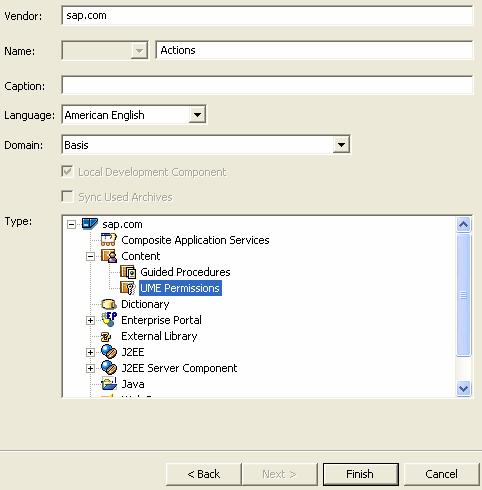
The SAP NetWeaver Developer Studio creates a project with the name LocalDevelopment~Actions~sap.com.
7. Expand this project.
8. Select the src node, open the context menu and choose New ® File.
9. Enter actions.xml in the File name: field and choose Finish.
The XML file is created.
10. Choose the Source tab page from the multi-page editor.
11. Enter the following XML tags that specify the actions for AccessQuickCarRental, ViewReservations, MaintainStandard, and MaintainPremium in the file:
<BUSINESSSERVICE NAME="QuickCarRental"> |
12. Save the data.
Next Step:
Build and Deploy the Archive File