Designing the Process Template
Use
To be able to make use of the activities you created in the previous steps of the tutorial, you have to assemble them in a process template. You also need to configure the process flow, consolidate parameters and define process roles.
Prerequisites
- You have the appropriate rights to work with GP design time.
More information: Authorizations
- You have created the activities described in the previous three steps of the tutorial.
More information: Developing Your First Composite Form Process
Procedure
Creating the Process and the Main Process Block
- Navigate to GP design time and from the contextual navigation panel, choose Create Process.
- From the Original Language dropdown box, select English and choose Create.
- Provide the following basic data:
- Name - My First Composite Form Process
- Description - Process for social benefits distribution
- Folder - select the folder created for the tutorial, for example, My First Composite Form
- Make sure that Block is selected from the Item dropdown box and choose
 (New).
 - In the Block Type Selection dialog box, select Sequential Block and choose Select.
- Select the block and enter the following basic data for it:
- Name - My First Composite Form Block
- Description - Block for social benefits distribution
- Make sure that Action is selected from the Item dropdown box and choose
 (Insert).
Insert the actions in the following order:
- Generate and Send Form
- Approve Social Benefits
- Approval Notification
- Rejection Notification
Configuring the Process Flow
- In the design time of the process, expand the Approve Social Benefits → Result States node:
- Select the Document approved result state.
- From the dropdown box in the Target column, select Approval Notification.
- Select the Document rejected result state.
- For its target, select Rejection Notification.
- Expand the Approval Notification → Result States node.
- Select The notification(s) have been successfully sent result state.
- From the dropdown box in the Target column, select Terminal.
- Repeat step 2 for the Rejection Notification result state.
Consolidating Parameters
- Open the Parameters tab page of the block and make the following consolidations:
- Group automatically the identical structures Interactive Form in actions Generate and Send Form and Approve Social Benefits.
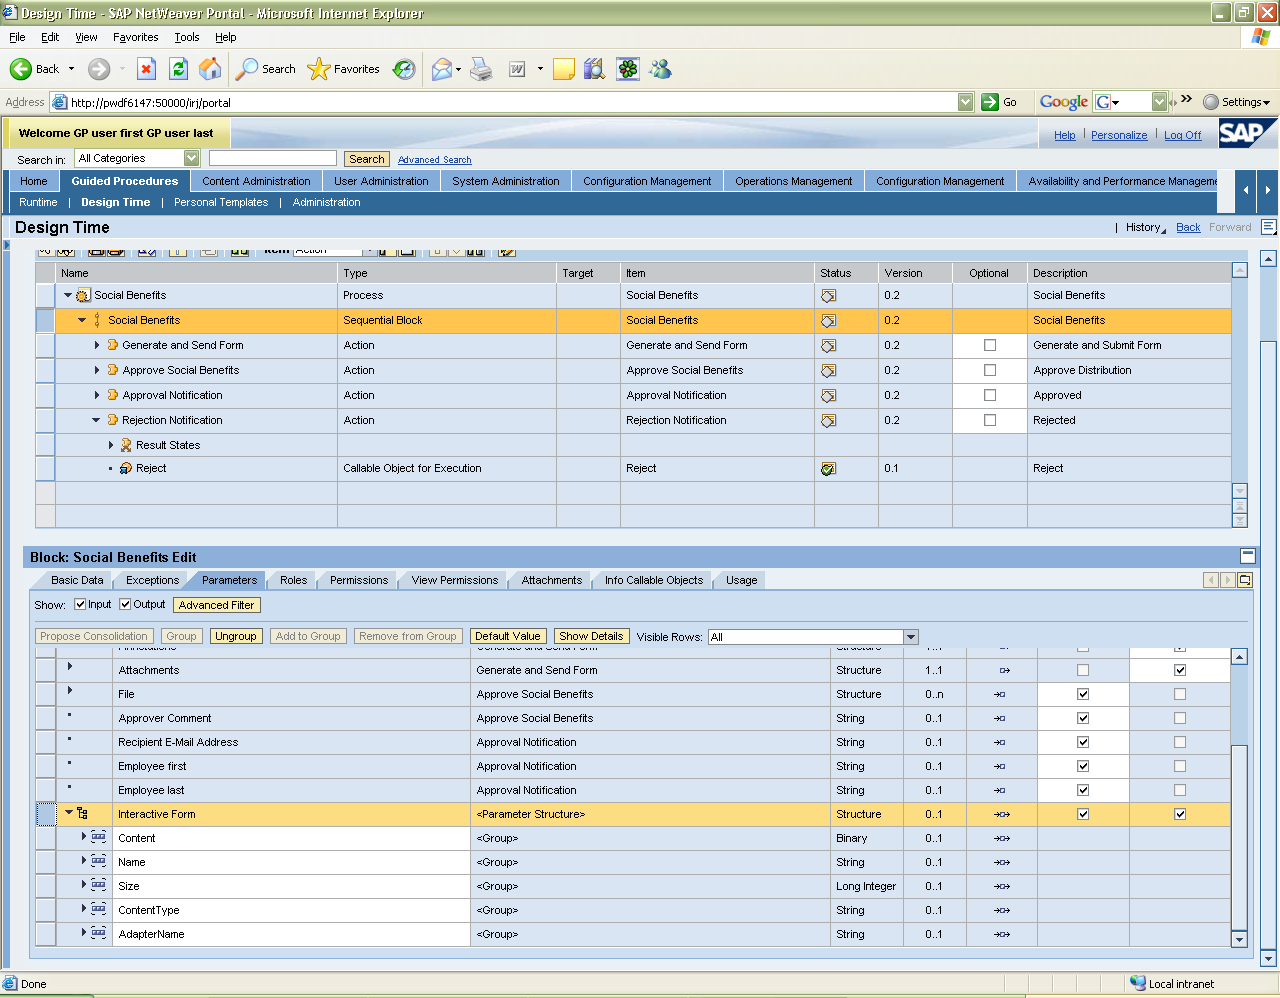
- Group parameters First Name and Last Name from Approval Notification, Rejection Notification and Generate and Send Form → InteractiveFormFields → Read User Info → User Data.

- Group the Recipient E-Mail Address parameters in Approval Notification and Rejection Notification with the E-Mail parameter in Generate and Send Form → InteractiveFormFields → Read User Info → User Data.

- Open the Parameters tab page of the process and disable the Exposed in Input indicator for all input parameters.
Configuring Roles
- Open the Roles tab page of the process and consolidate the existing roles.
- Set the role type of all standard roles (Administrator, Overseer, Owner) to Initiator.
- Consolidate the custom roles and set their role type to Initiation Defined, so that the approver and the employees can be selected at runtime.
- Finally, choose
 (Save All) and
  (Activate).
Result
You can now initiate and test the process in GP runtime.